by Ellis Friedman Fitch
You’ve got a list and they need to hear from you! But first, you’ve got to get that list into Infusionsoft. Great news: it’s neither very hard nor overly time-consuming. Here’s how to import your contacts to Infusionsoft.
First, make sure your list of contacts is in a .csv file format. This is a great time to make sure you’re importing the best list you have by cleaning out your list. If you have a large list that you haven’t managed in a while, this step may take you a while. Here’s a checklist of things to do to clean up your list before you import:
- Remove irrelevant data like duplicates, empty fields or columns, or data that you don’t need
- Check your column headers to make sure they’re clear (like “phone” instead of “Ph”)
- Make sure your column headers describe the data that’s actually in them (i.e. you don’t want email addresses in the “phone” column)
- Make sure all dates are uniformly formatted (see the Help Center for accepted formats)
- One phone number per column - don’t separate with commas, just make a “Phone 1” and “Phone 2” column and separate them. Make sure extensions are a separate column
- Separate your address columns into street address, city, state, and zip code; don’t put the whole thing on one line
- Make sure country names are spelled in full
- If you want to import a column of data as a tag, separate the tags with commas, not any other punctuation (for example: customer, partner)
And of course, you want to make sure that if anyone has opted out of your email list, that they have been totally removed and that you’re not including them in your import.
Here’s an example of what a clean .csv list would look like:
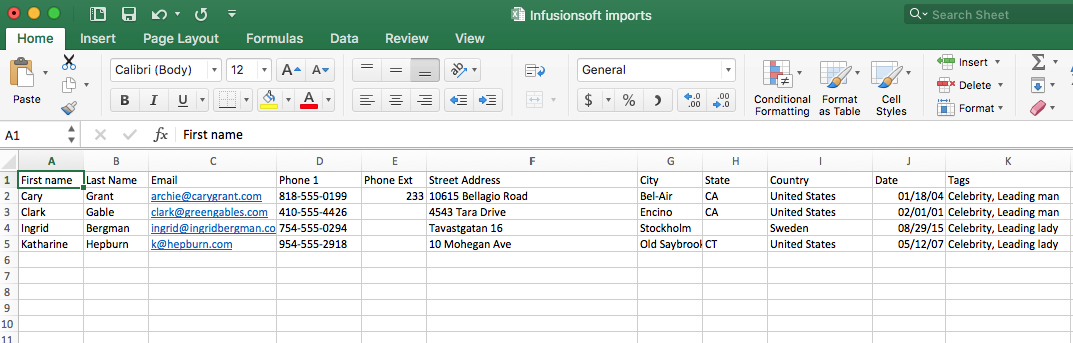
You can also see some more sample .csv files at our Help Center. And if you’re using Excel, make sure you save as a comma delimited .csv.
Let’s get started with importing!
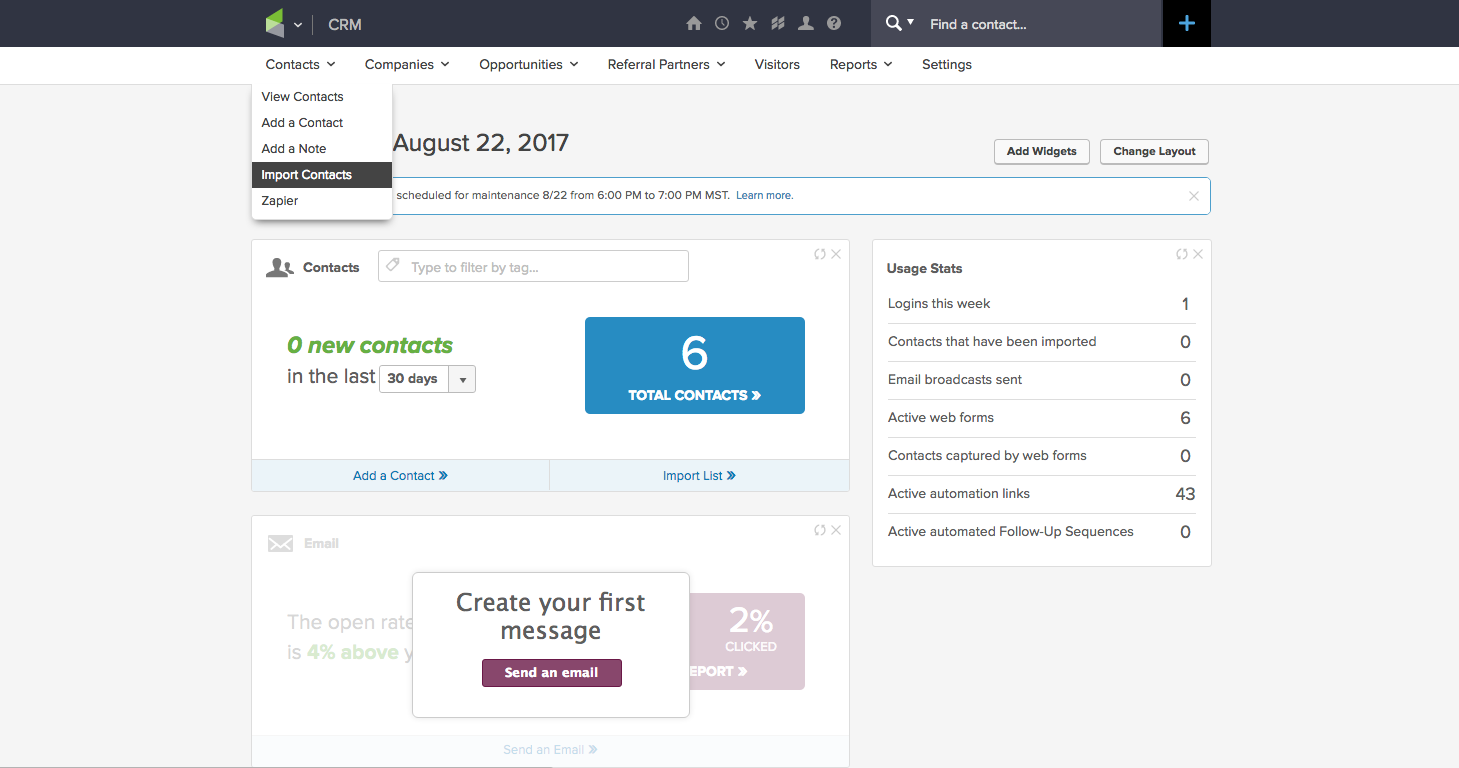
Once you’re logged in to your app, go to CRM > Contacts, and select Import Contacts from the dropdown menu.
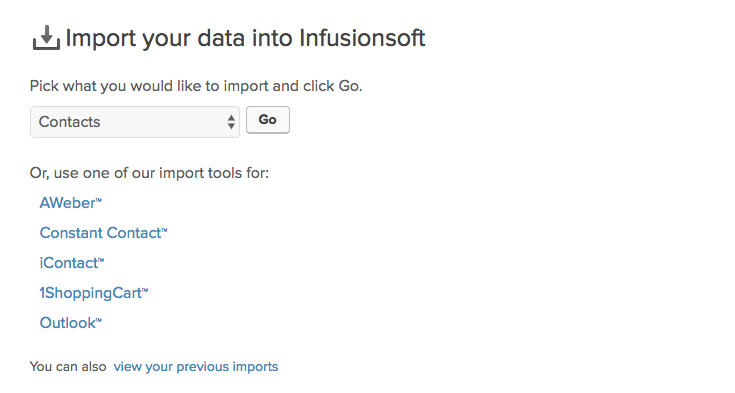
Then select the type of data you want to import and click Go.
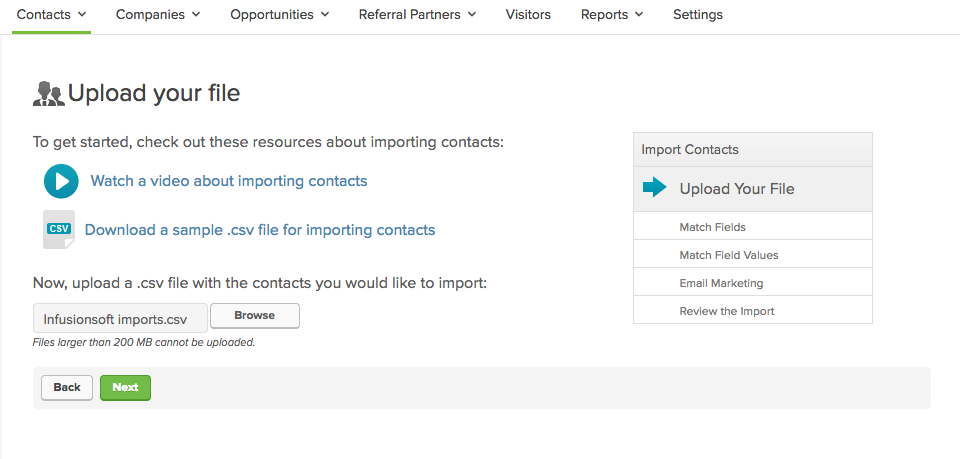
At this point, you can take a movie break and watch a video about importing contacts, or just keep going by clicking the Browse button and finding your .csv import list. Then hit the green Next button.
Now comes the excitement - it’s time to match the fields! On the left, you’ll see the fields from your .csv file. On the right are the corresponding Infusionsoft fields. Green arrows between them mean you’re good to go; yellow exclamatory triangles like I have mean you need to pick from an Infusionsoft field.
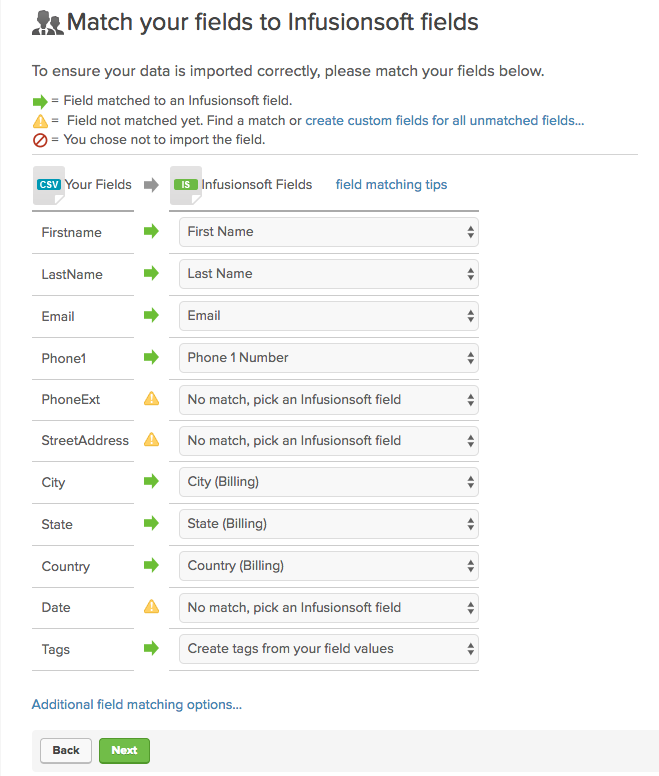
Here’s what that looks like once I’ve selected all the Infusionsoft fields:

Hooray, we’re green! Click the green Next button.
If you’re really rolling, you may get this screen about matching your field values to Infusionsoft’s.
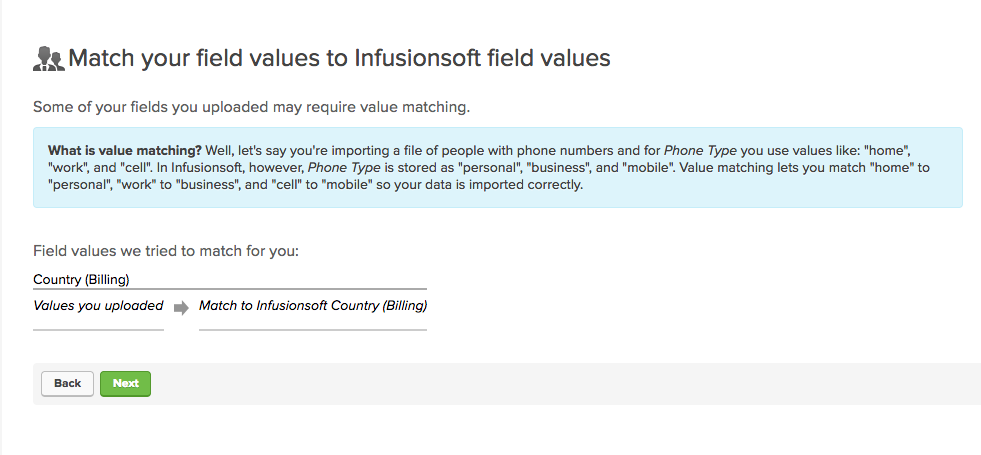
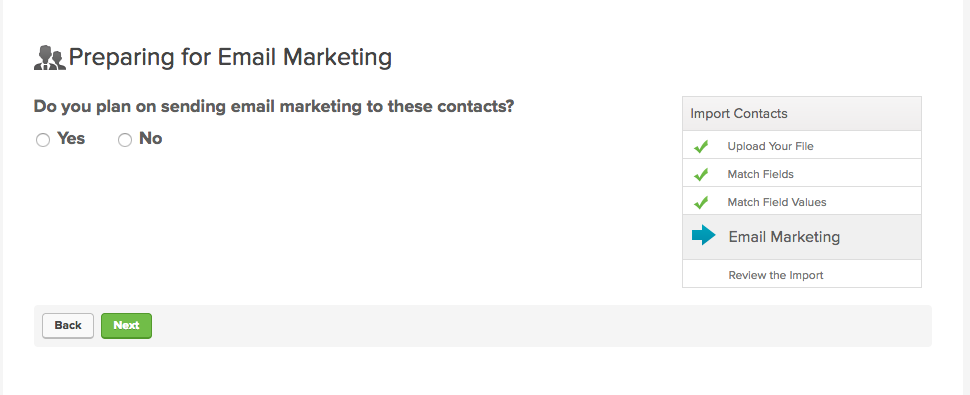
No sweat; these field values match up, so just hit the green Next button and you’ll be asked if you plan on sending email marketing to these contacts. If you select No, your contacts will be imported and you will be able to send each contact individual emails, but you cannot use these contacts in Email Broadcasts or Campaigns.
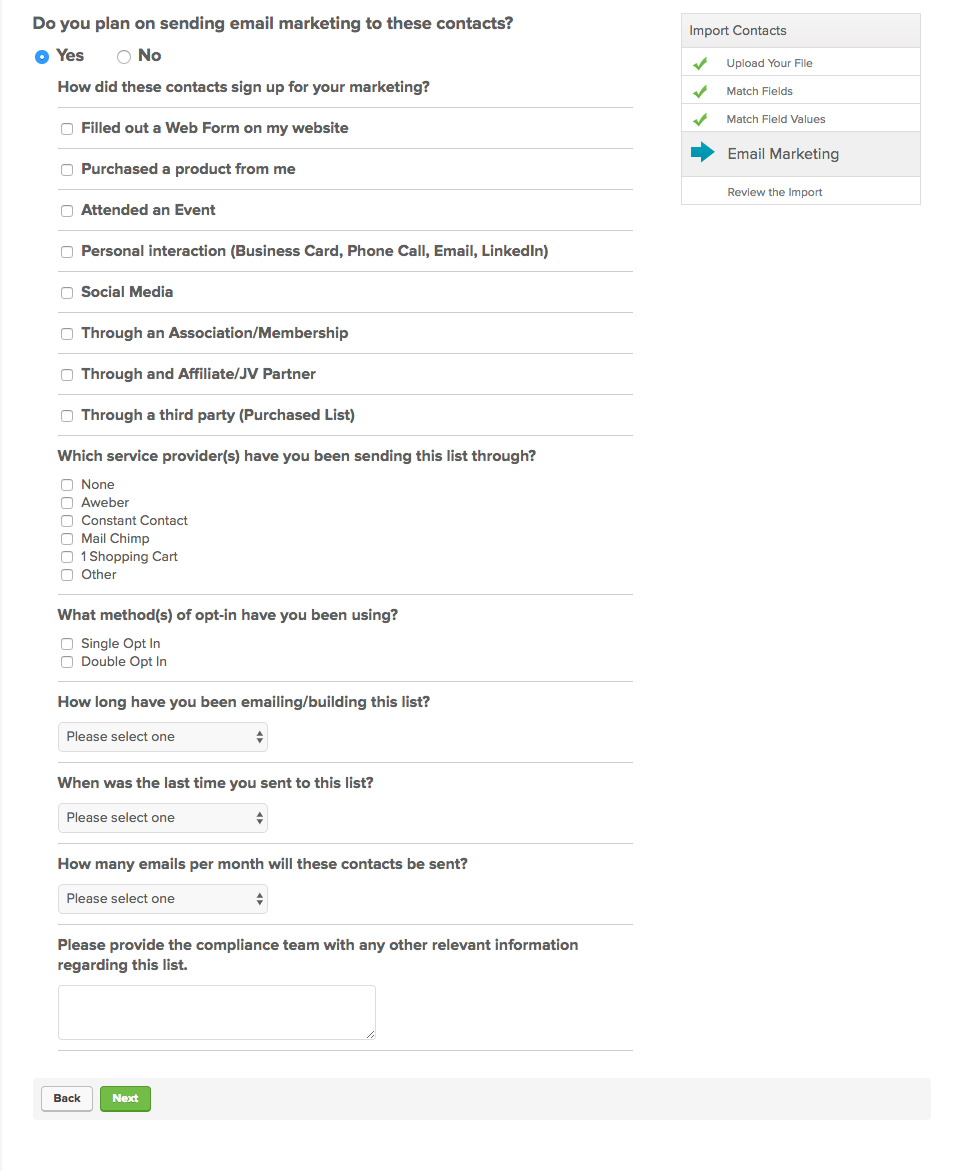
If you select Yes, this means you agree to the Infusionsoft Acceptable Use Policy and have to answer the questions that pop up:
Then you’ll have some questions to answer about how you obtained these email addresses and how you’ll be emailing them. This isn’t just to slow you down - it’s to make sure that you’re sending emails to people who have explicitly asked to receive them. This helps safeguard Infusionsoft’s sender reputation, which ensures that you and all our other customers can continue to send emails. Basically, we don’t want our customers to spam people. So go ahead and fill out the form.
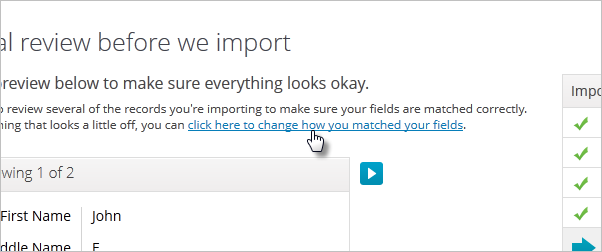
All this will be sent to our compliance team for review while you get a chance to review your import. You can scroll through your contacts to make sure that everything got in all hunky dory.
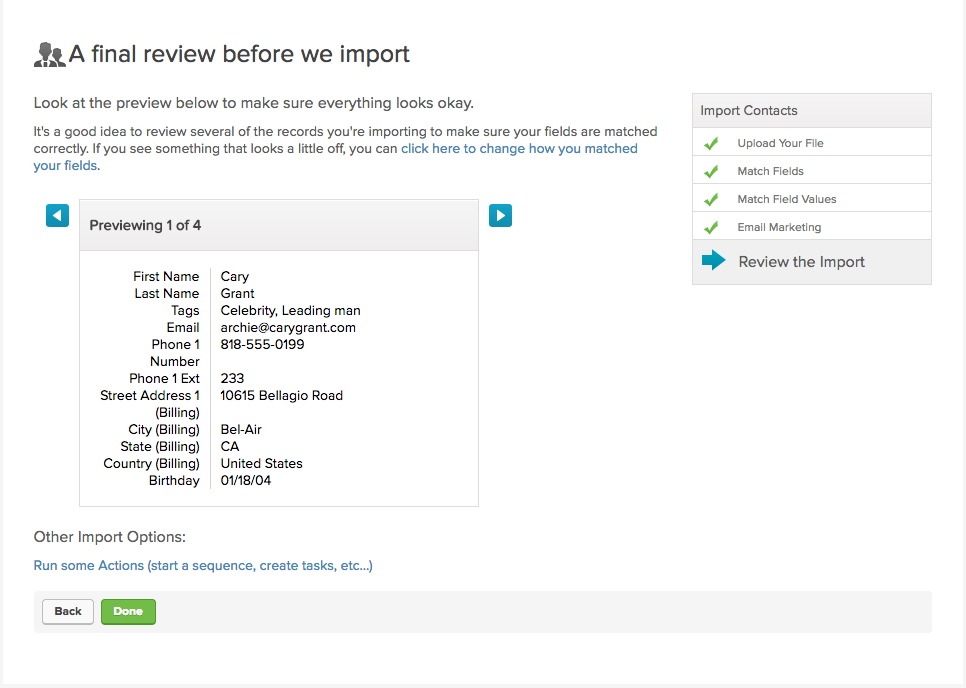
If you made a mistake, you can click the link to make changes before proceeding.
Once you’re good, click Done.

Huzzah! Join us and our running stick man to celebrate that you just imported your contacts into Infusionsoft! From here, you can click into your list of imported contacts, or you can click to create an Email Broadcast to send to those contacts.
But for today, we’ll leave you and your imported list of contacts here. Have some more questions? Check out the video library on our Help Center.